

Build your first event
Step-by-step guide to creating and promoting your first event
Creating an event in SupporterBase only takes a few minutes. You can then promote it, share the sign-up page, and track RSVPs all in one place.
Part 1: Creating an event
Start a new event
From the left-hand navigation, select Events > Create new event.
Fill in event details
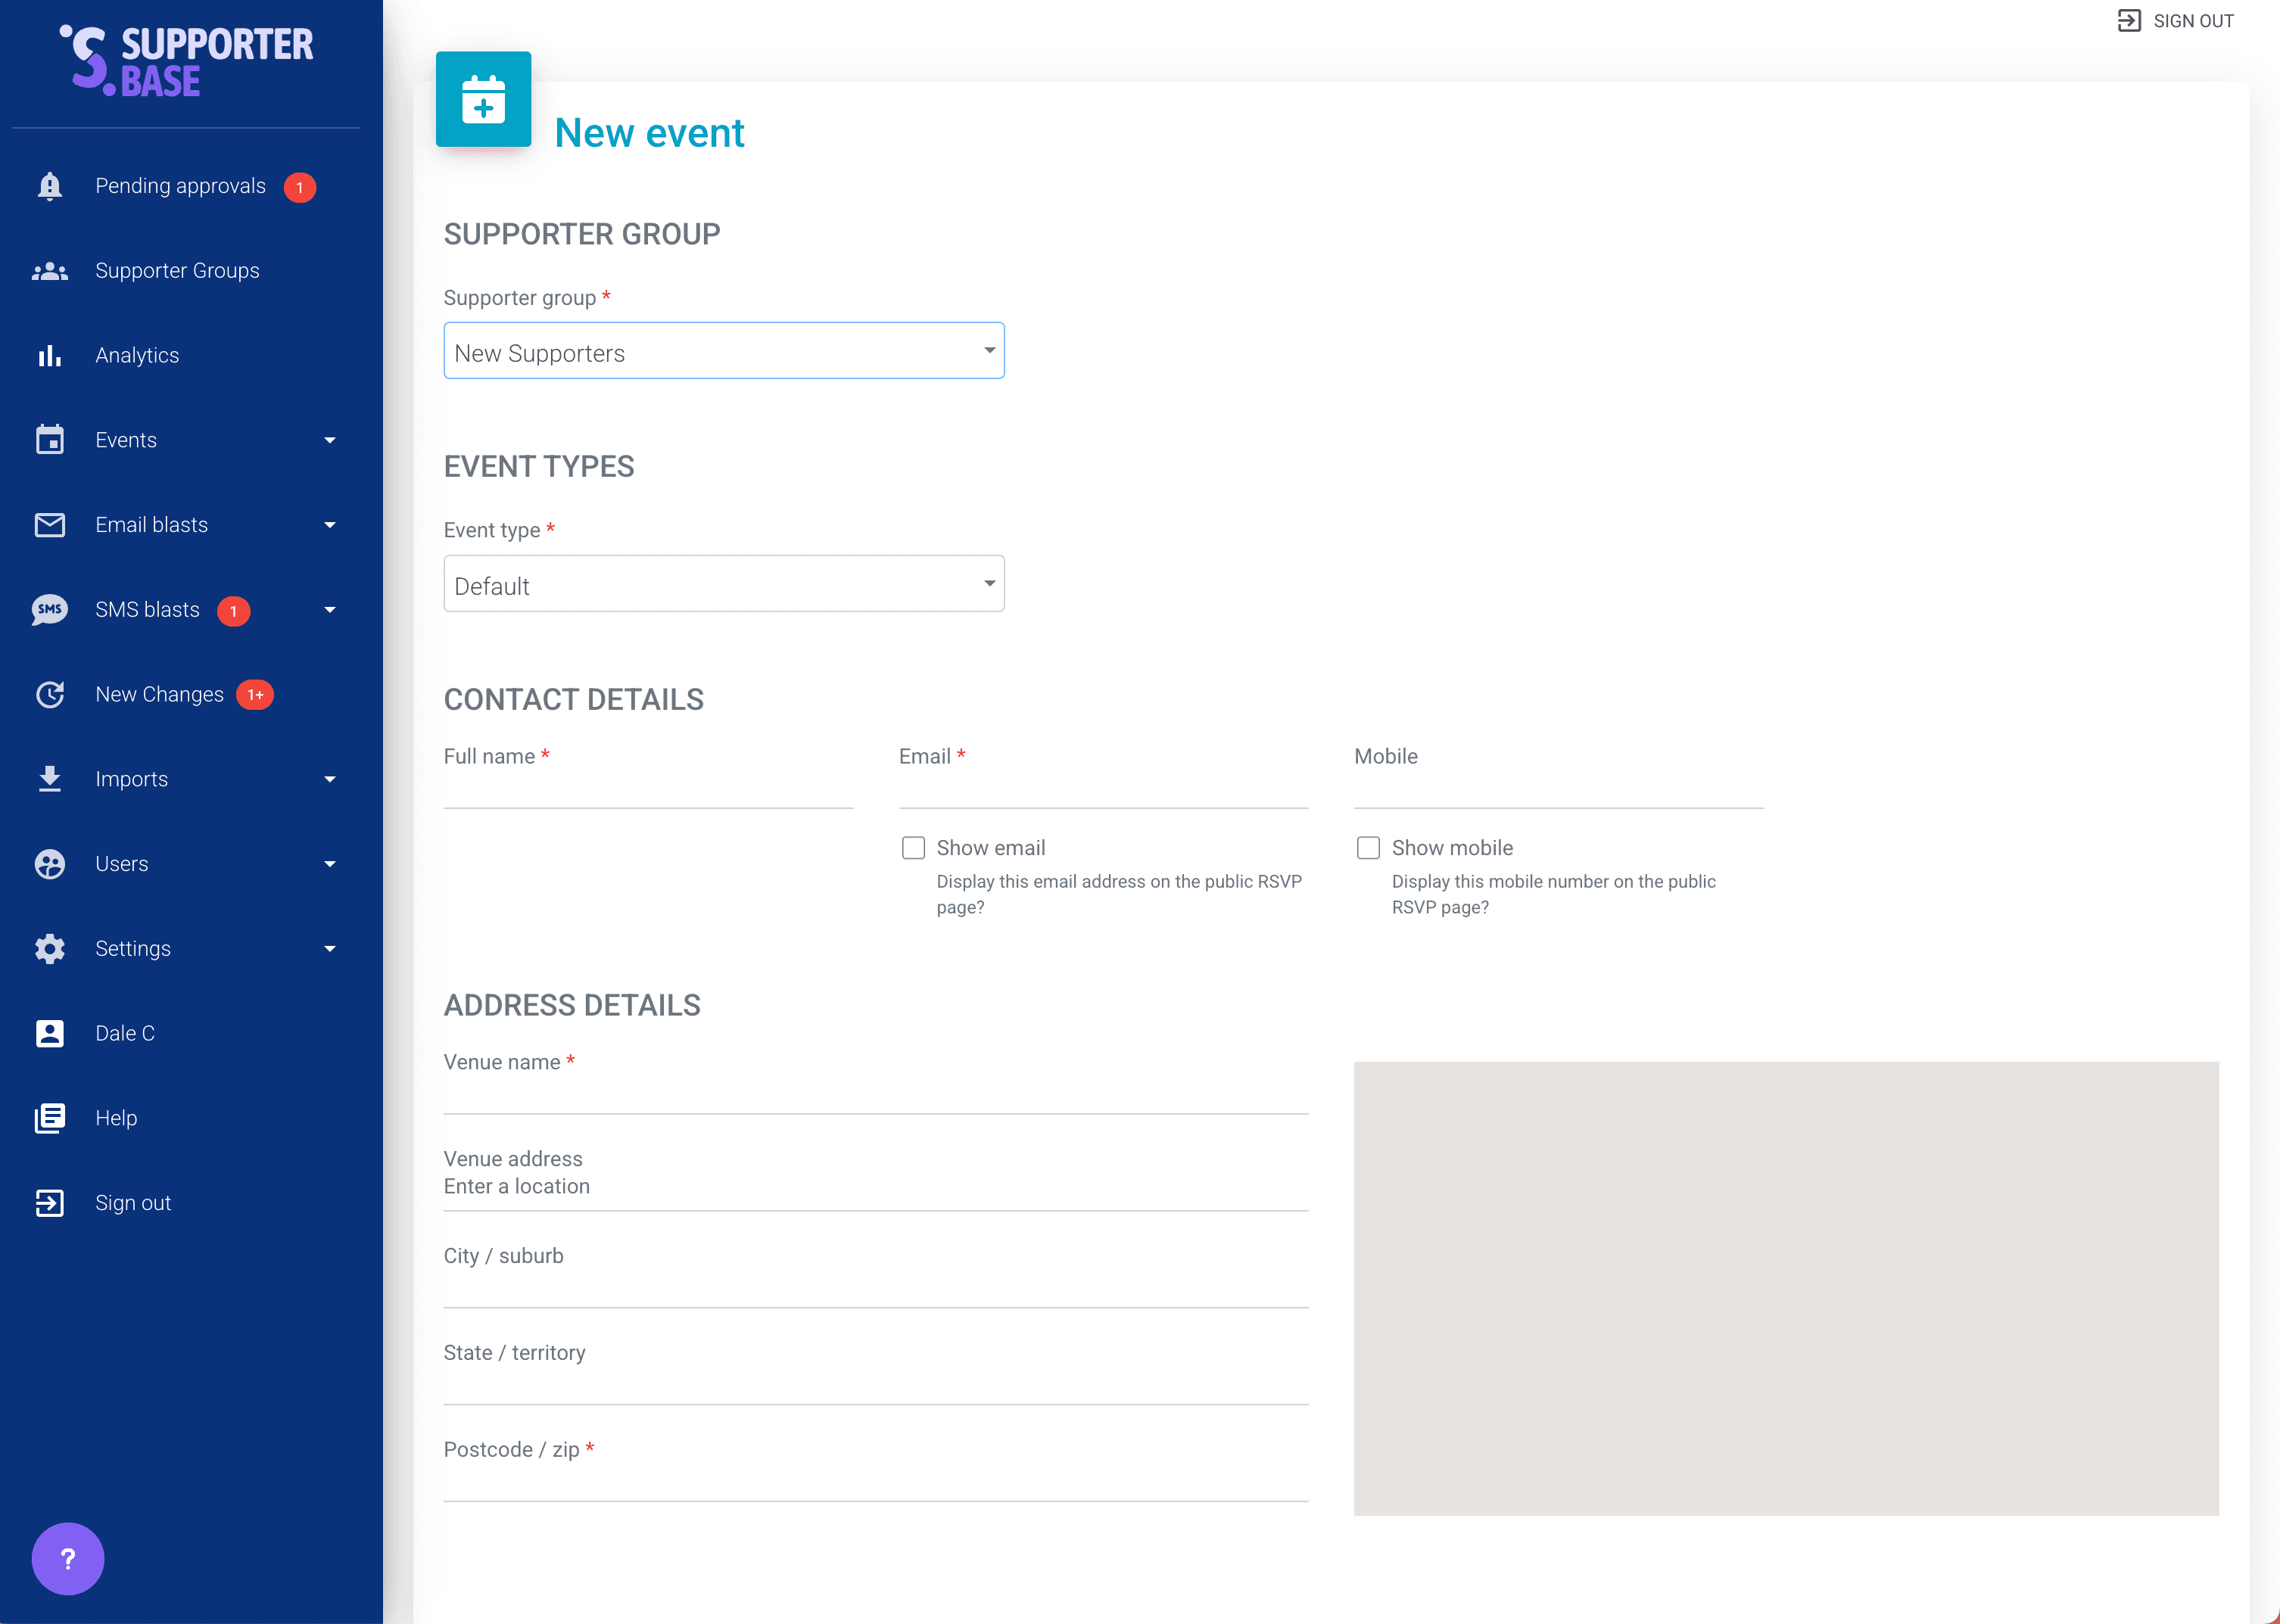
- Select the Supporter group from the dropdown.
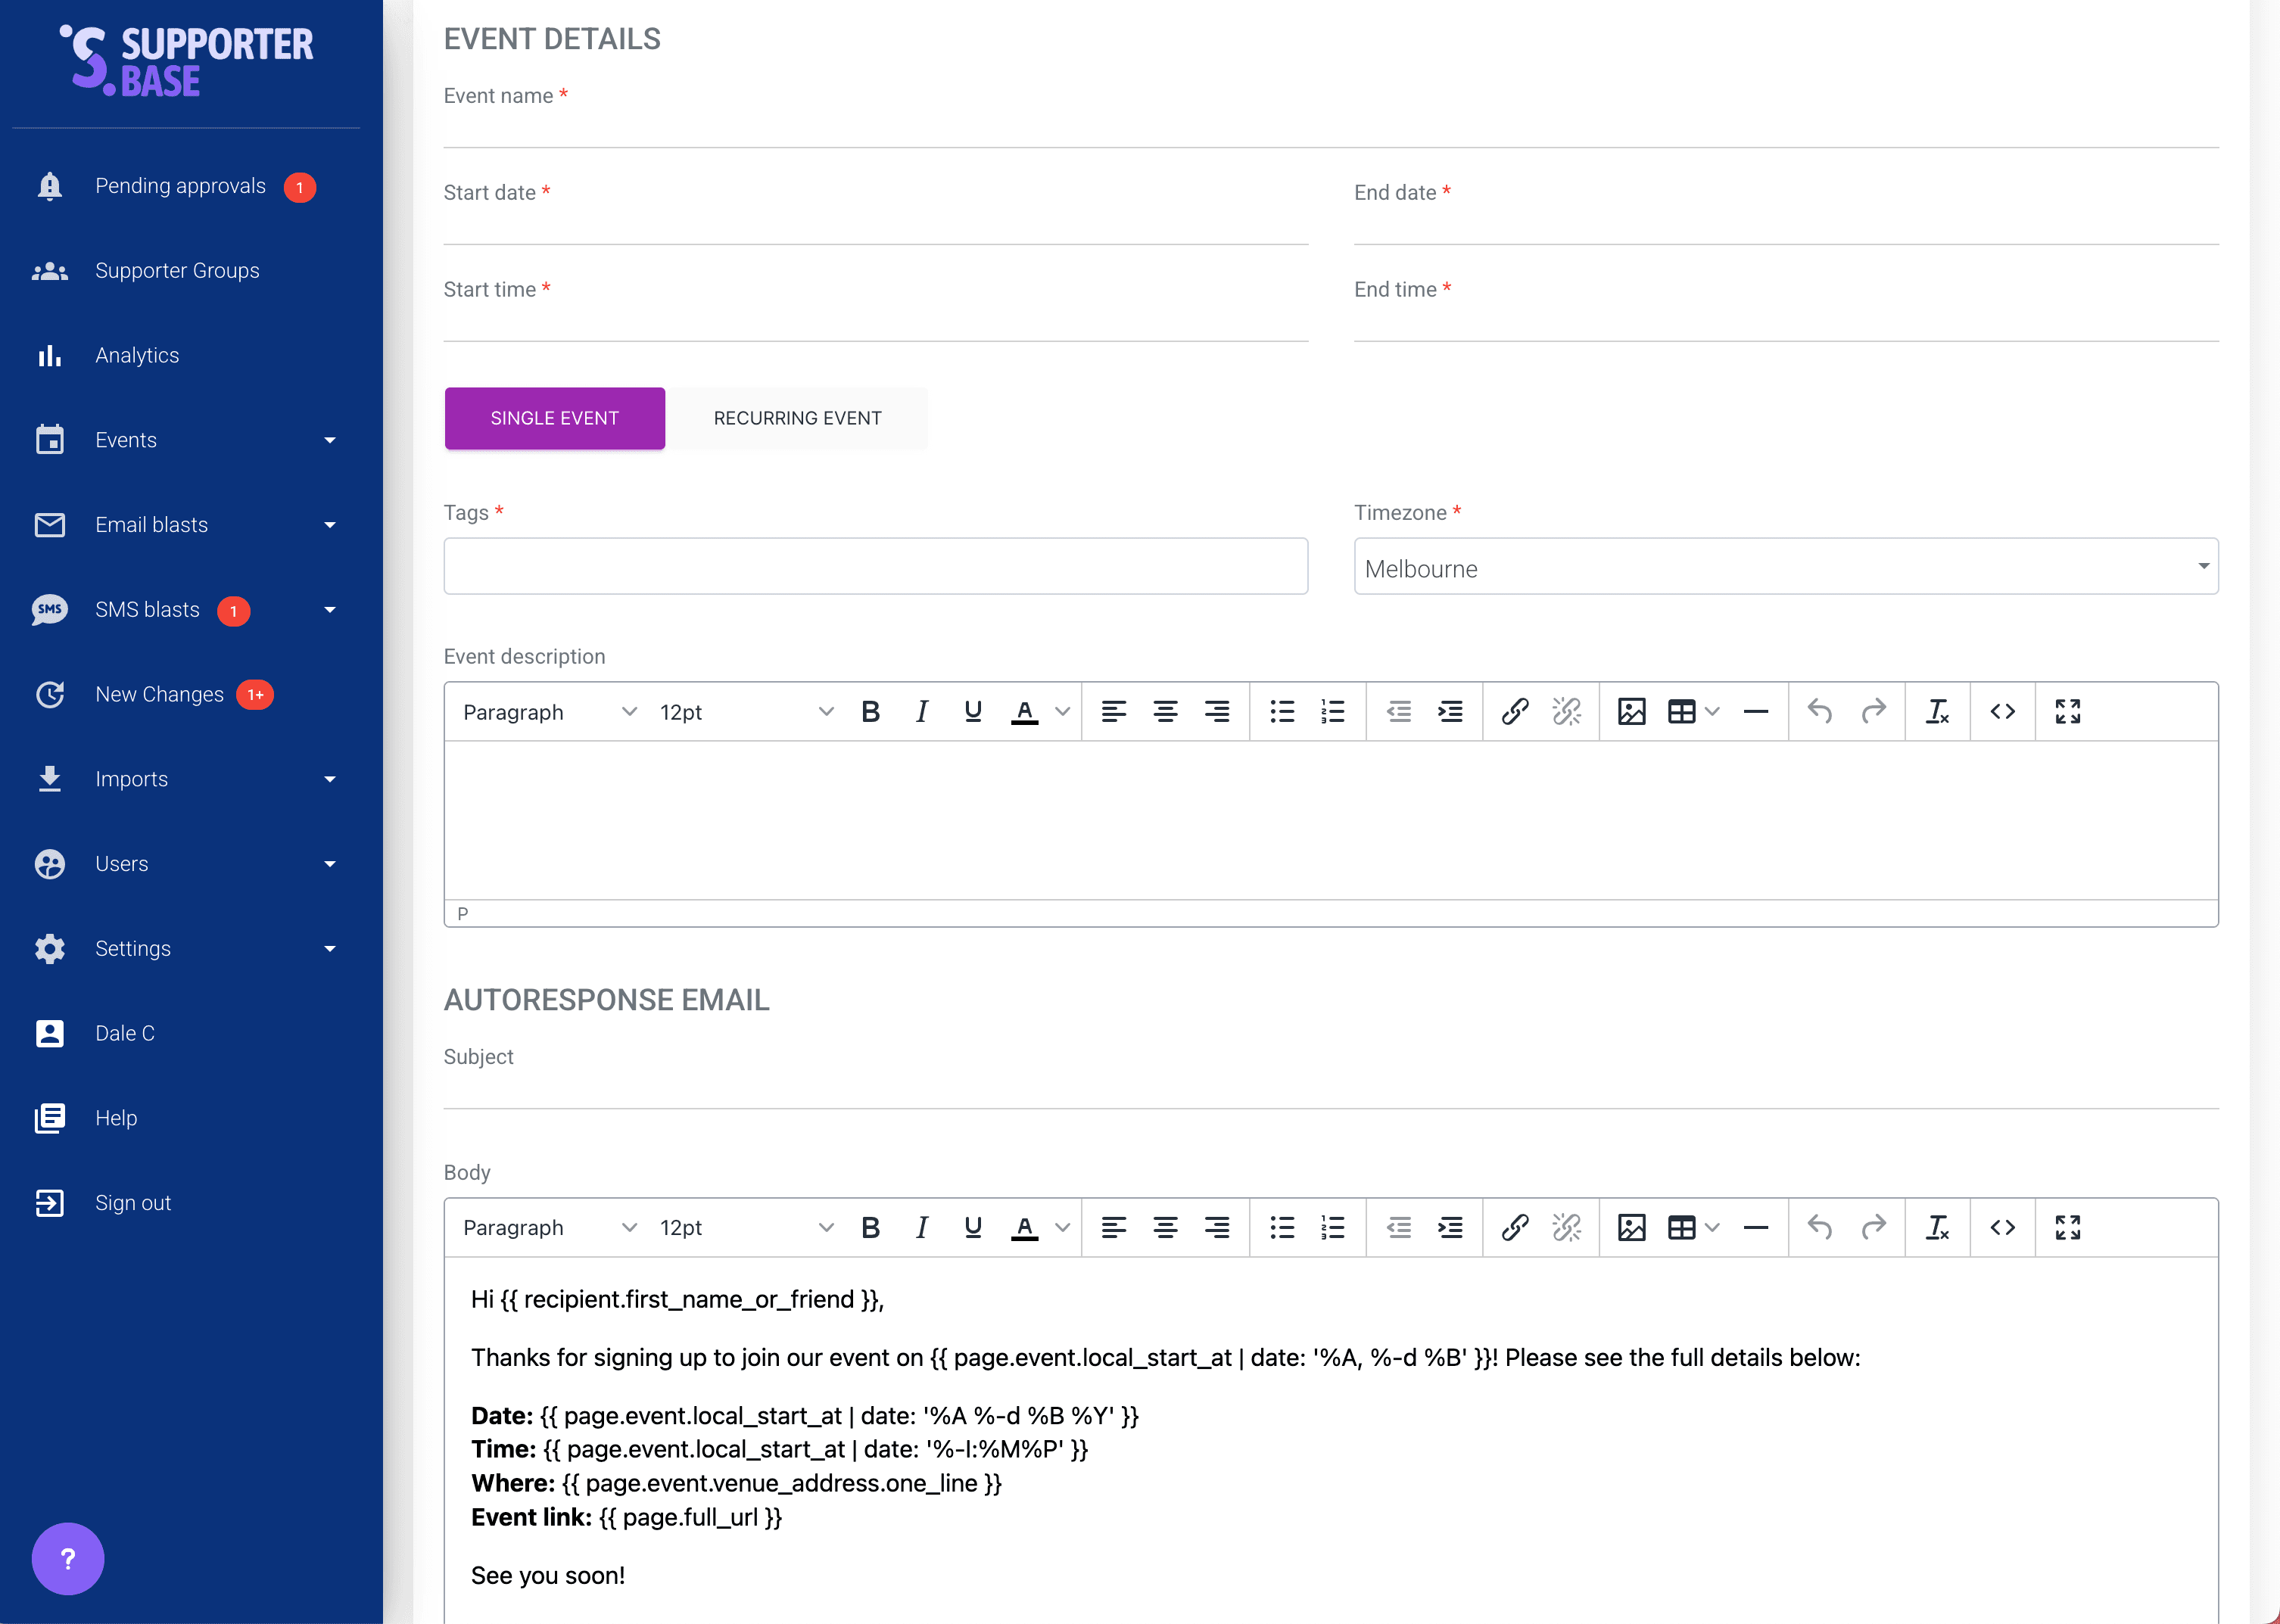
- Add the event basics: title, time, date, location, description, event contact person.
- Scroll to the Autoresponse email section at the bottom:
- Customise the confirmation email sent to supporters when they RSVP to your event.
- Keep the liquid code (the words in {curly braces}) if you want details to auto-populate.
Publish the event
Click Create event.
- Admins or group captains: the event goes live immediately on your group's public page.
- Vice-captains: the event is saved as a draft and sent to your group's captains and point people for approval.
Edit an event
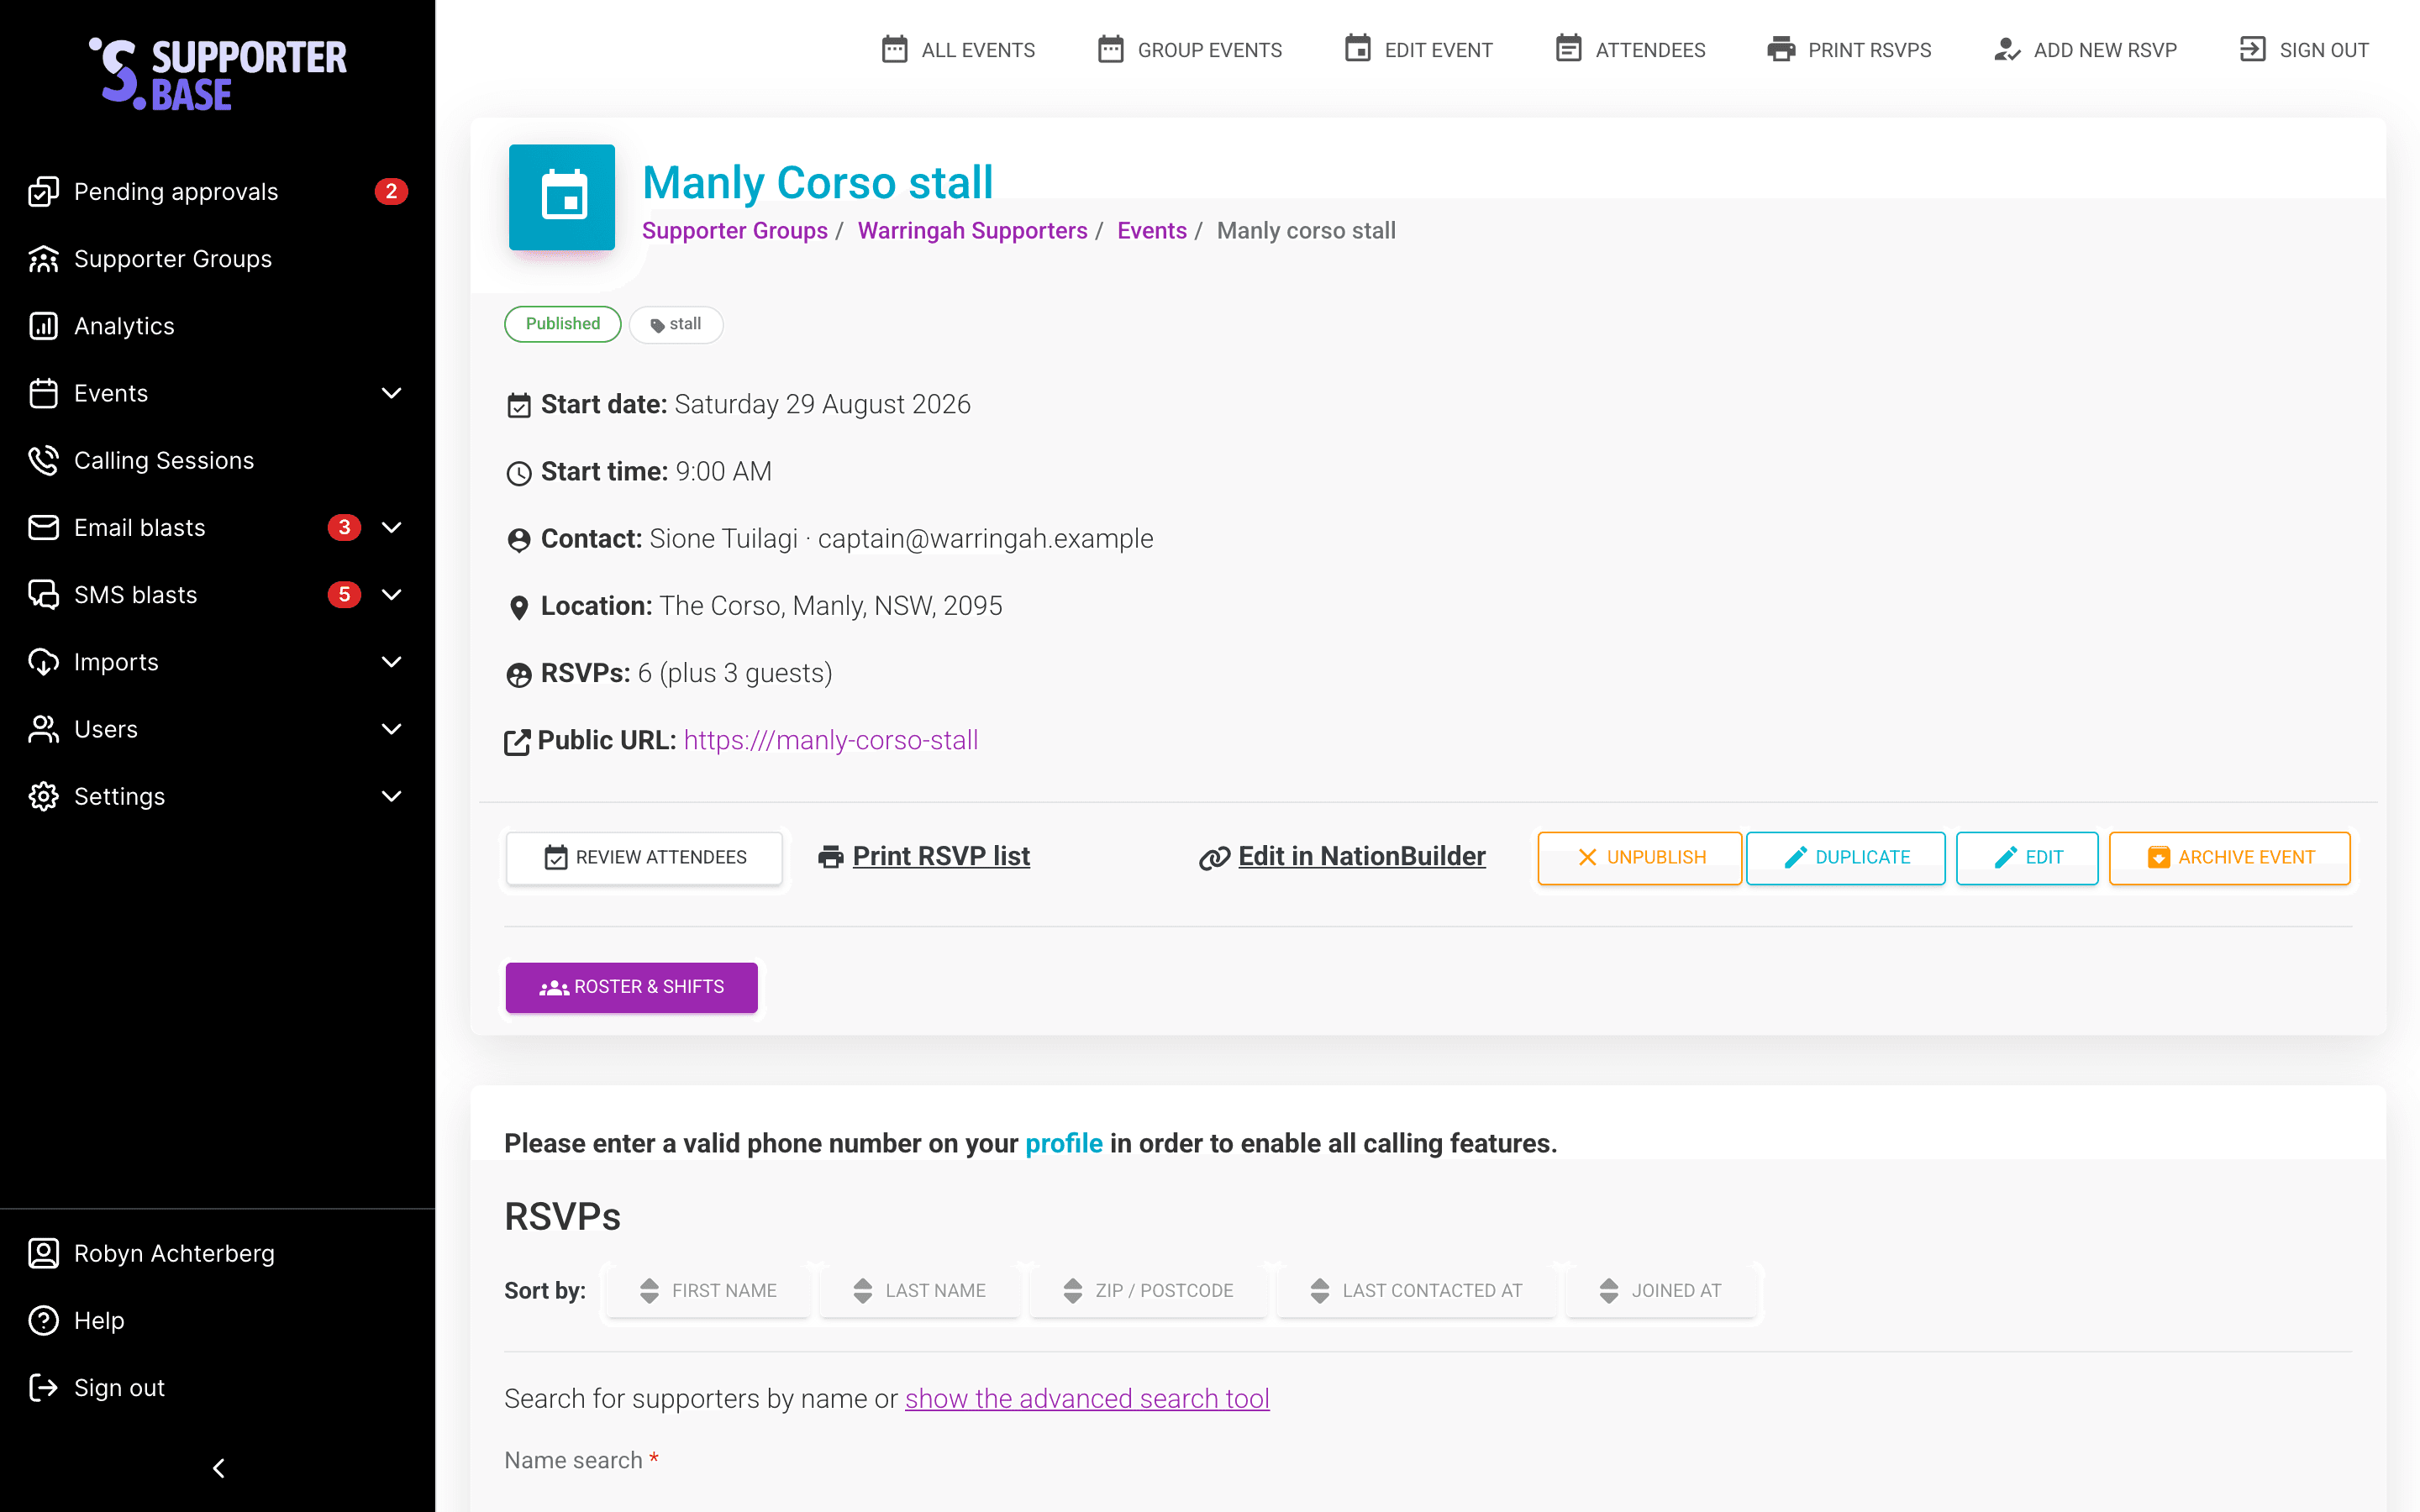
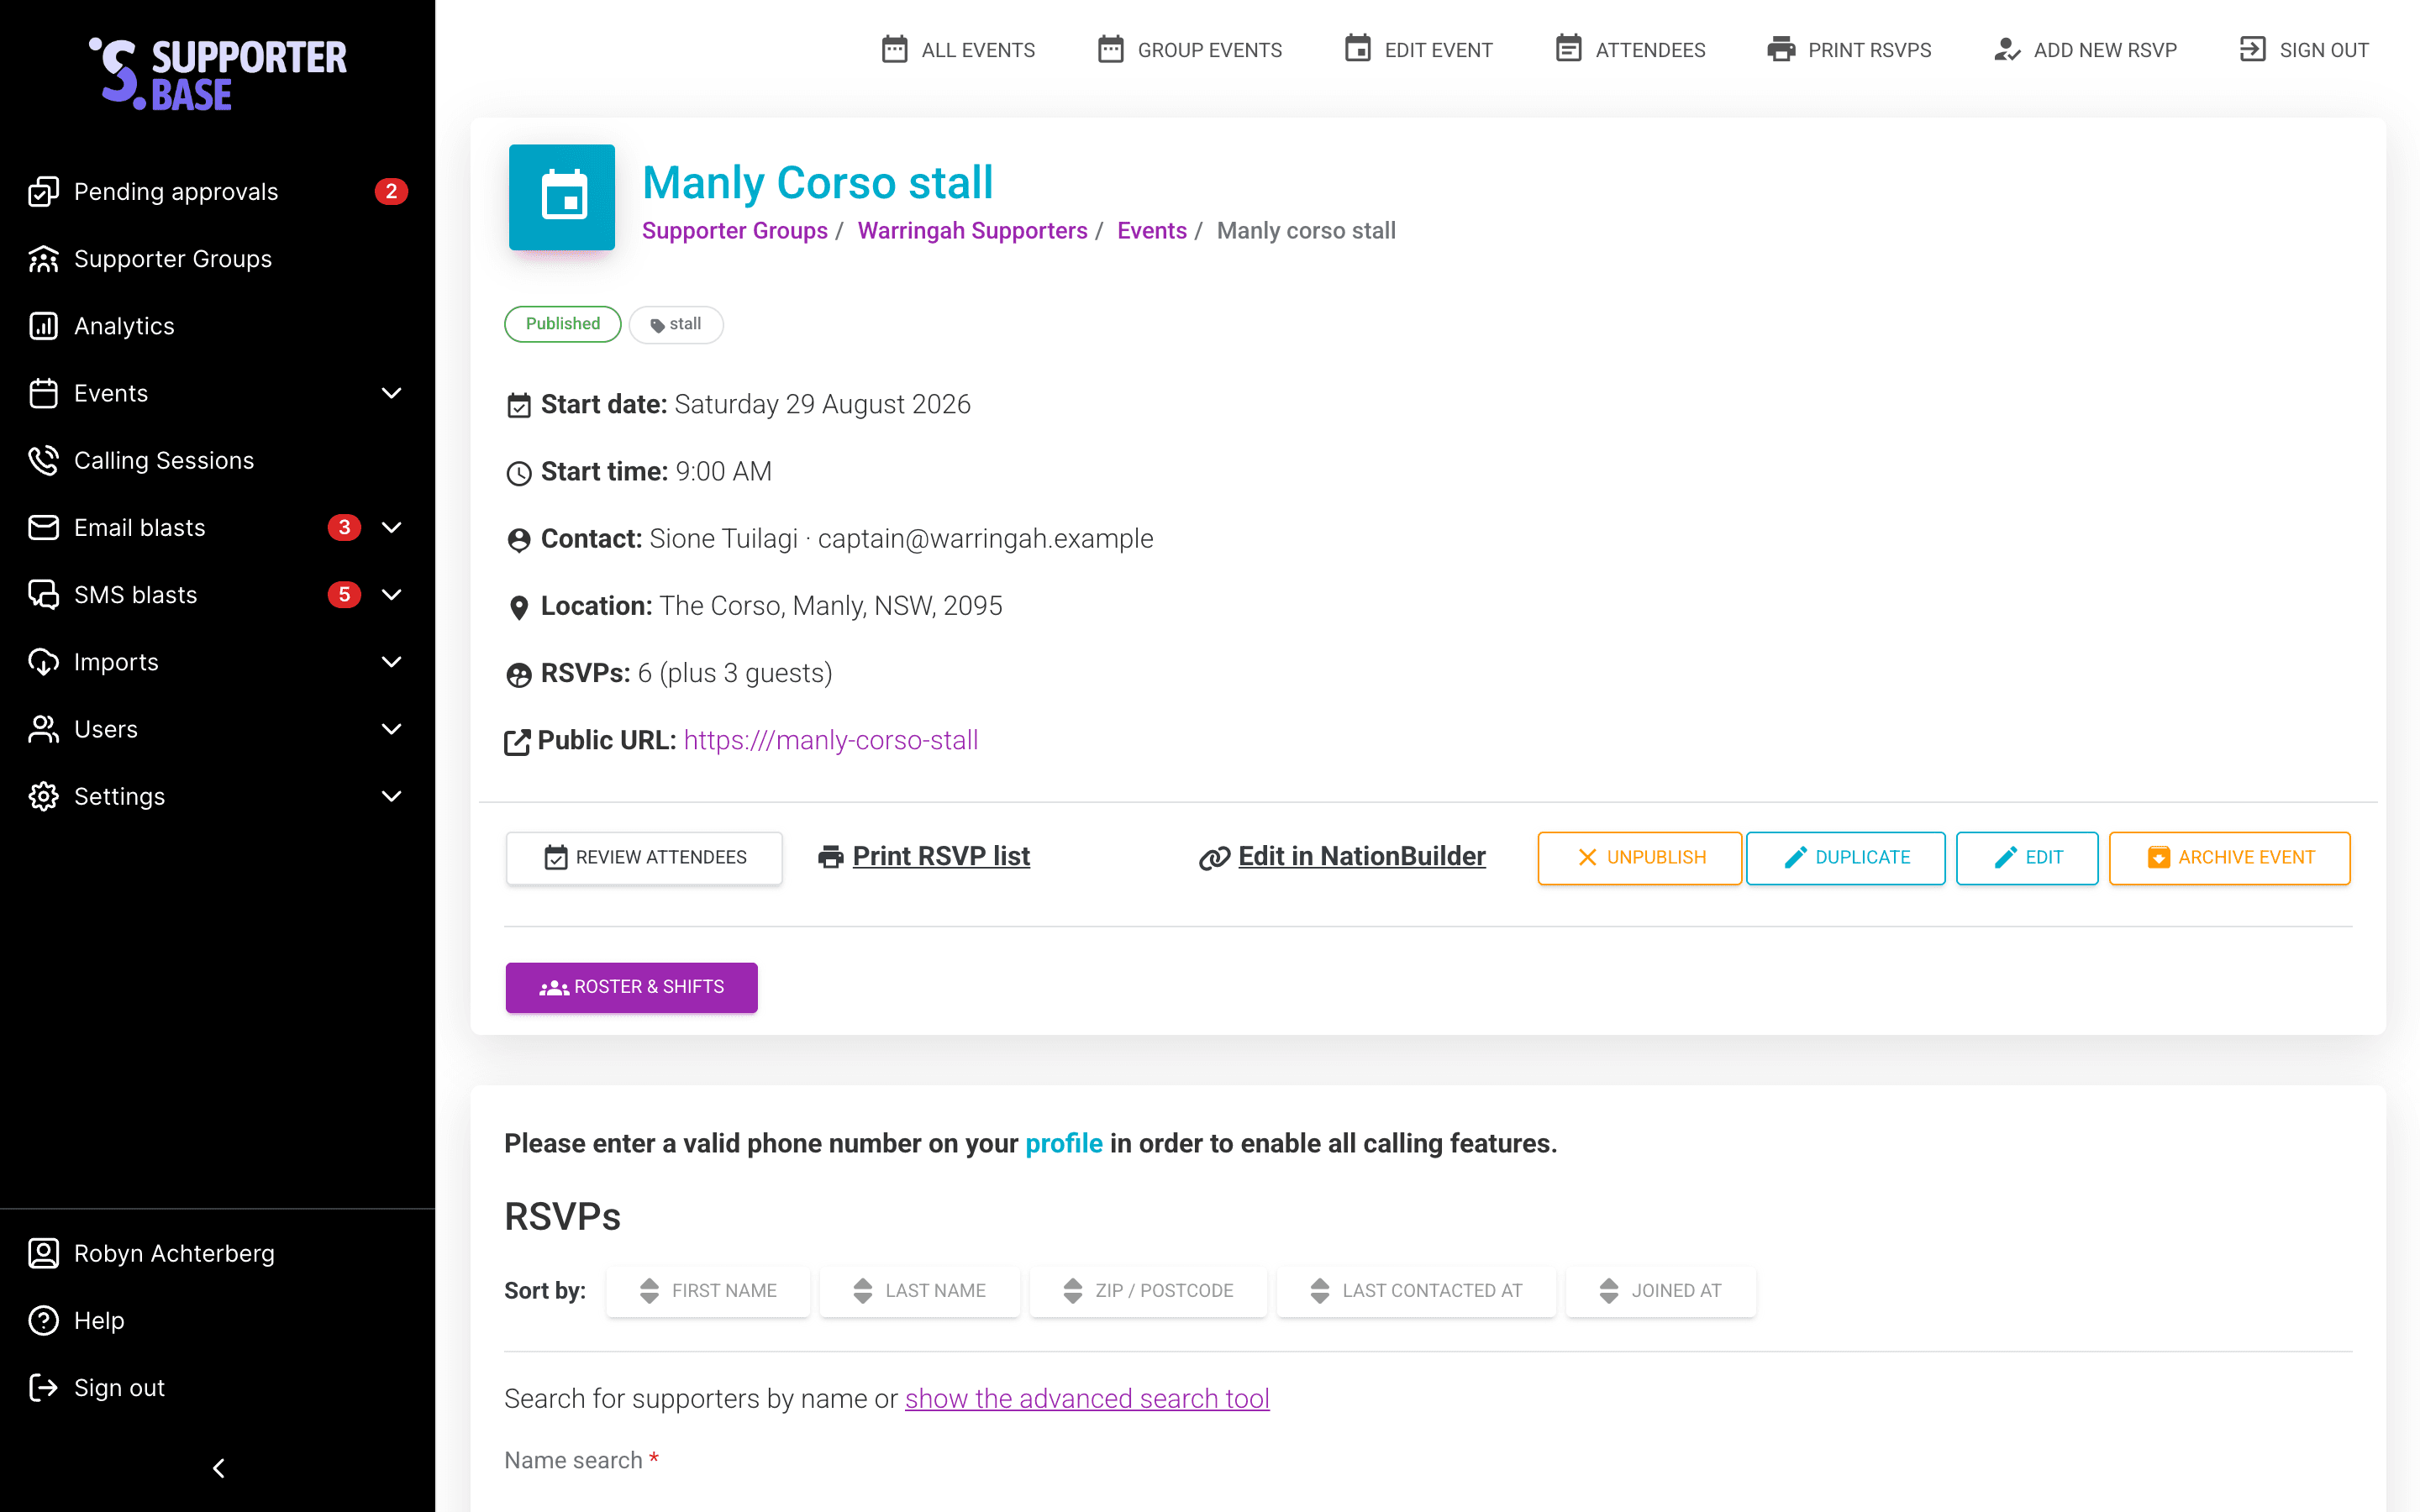
Go to the event page. Click Edit. The button sits in the row below the event details, alongside Duplicate.
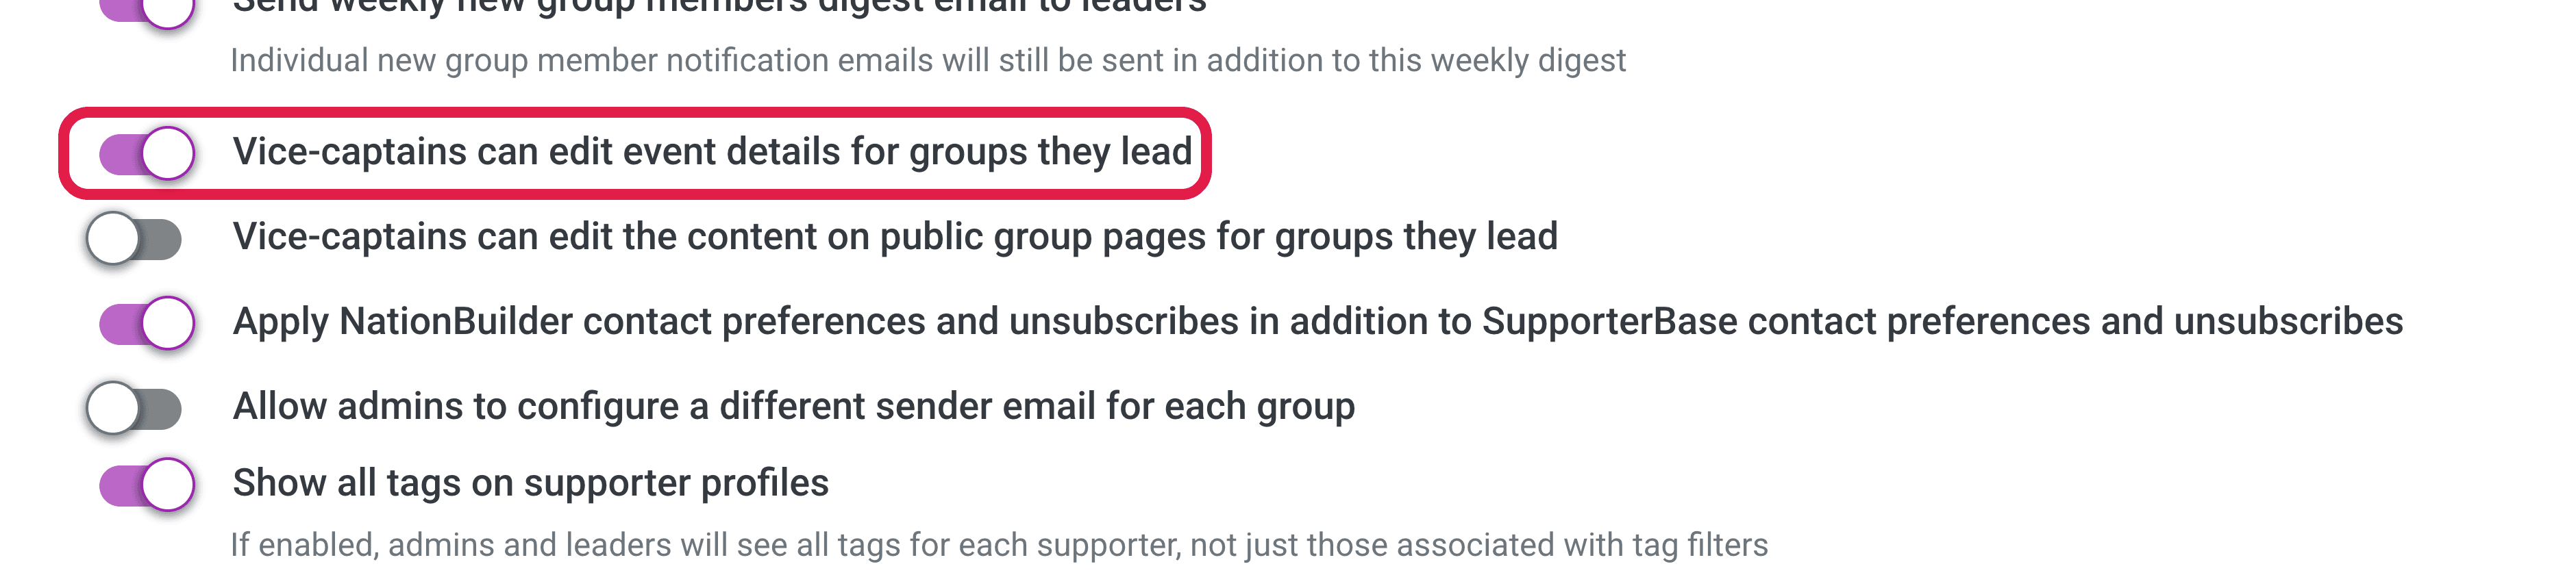
Vice-captains can only edit their group's events while Vice-captains can edit event details for groups they lead is on. Find it under Settings > Configurations > General. It is on by default.
Part 2: Promoting your event
The easiest way to promote your event is with a blast email or SMS.
- Copy the URL of your event's public sign-up page (auto-generated when you publish).
- Paste it into the body of your blast email or SMS.
- Send. Supporters can RSVP directly via the link.
For detailed instructions, see our guide on how to send SMS and Email blasts.
Part 3: Managing RSVPs
Viewing RSVPs
- Open Events > Group events and select the event.
- RSVPs appear under the event's basic information.
You can engage with each RSVP through their personal profile:
- Edit profile info
- Send personal SMS or email
- Call directly
- Log a contact
Sorting RSVPs
At the top of the RSVP list, use Sort by to order by:
- First name
- Last name
- Zip / postcode
- Last contacted at
- Joined at
Adding RSVPs manually
Supporters can RSVP in several ways:
- Via the public event sign-up form
- From within an email or SMS thread, or a call list (handy when confirming RSVPs during outreach)
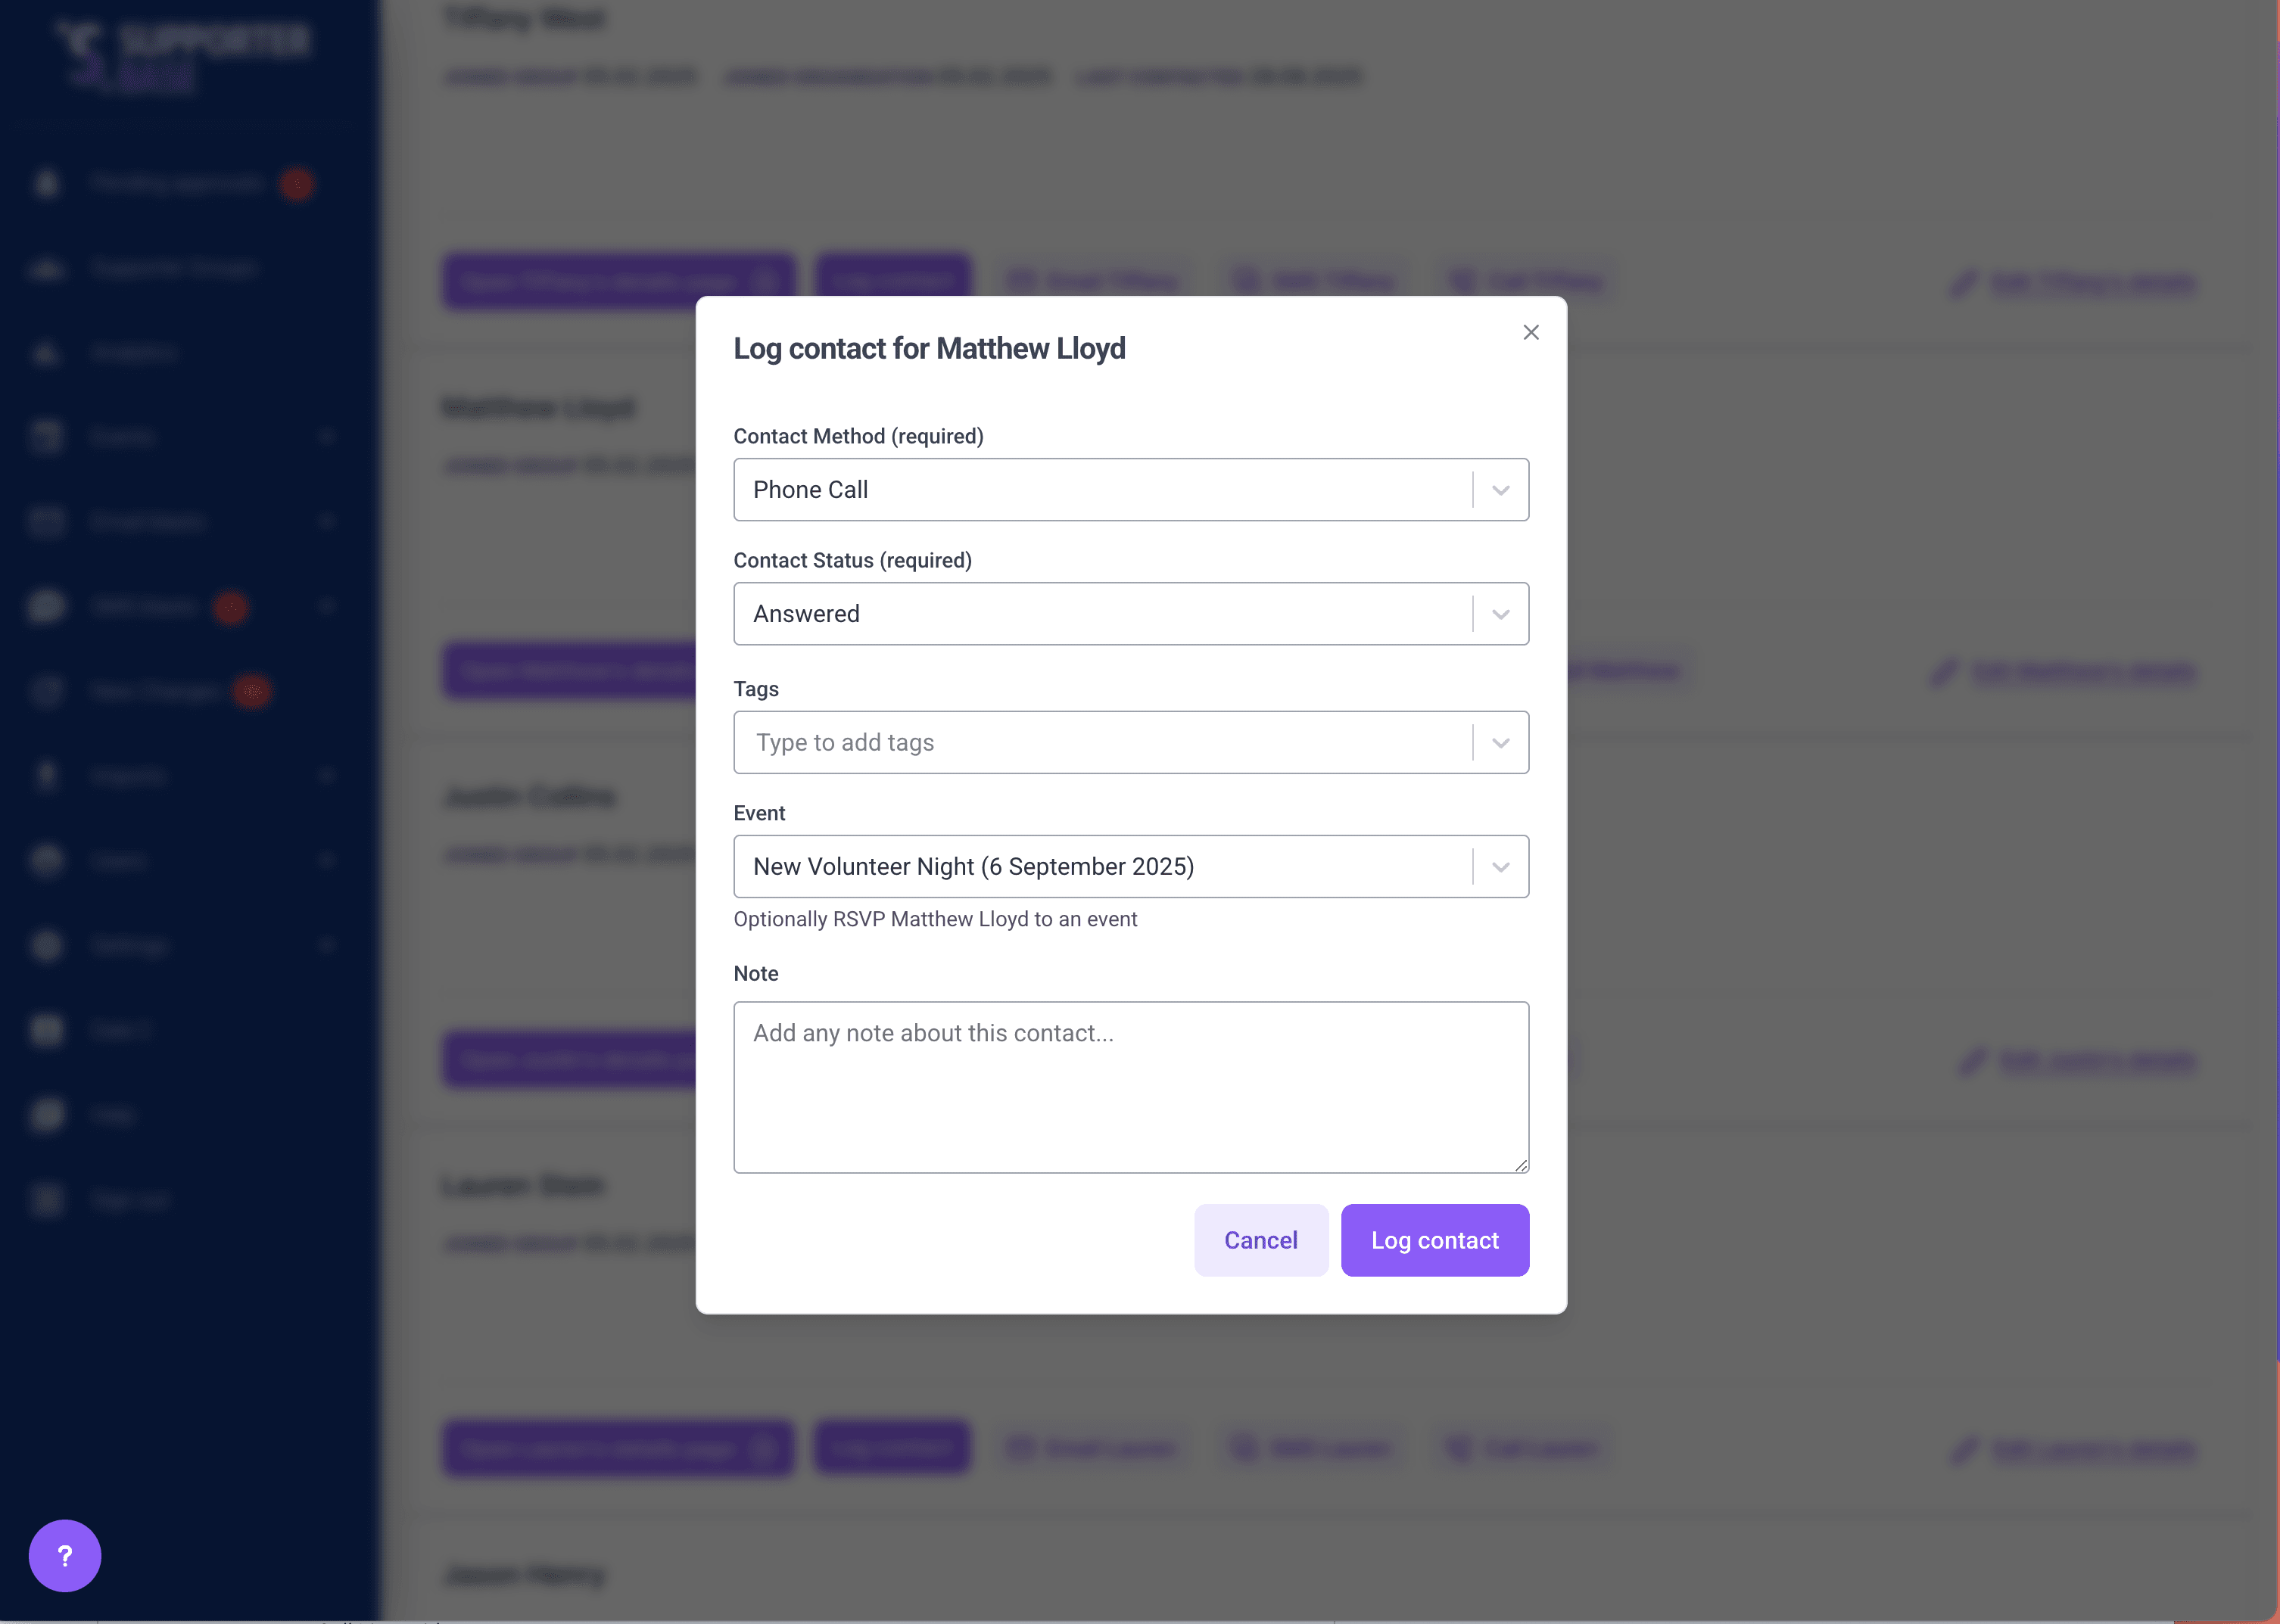
- From a supporter's card on the event page using the Log contact or RSVP button, which opens a form with an Events field for the RSVP
Add to calendar
Contact our team if you'd like an "Add to calendar" widget. It displays on your event once someone RSVPs.